
WWW.SKULLFORGESCENICS.ETSY.COM
Tuesday, May 28, 2013
Tuesday, May 21, 2013
Skaven Pirate Ship
The Terrorgheist is primed and waiting patiently, as are all of my other personal projects while I focus on freelance and commission work, none of which can be shown off yet. In the meantime...
Someone recently brought up The General's Compendium, the Warhammer campaign (and much more) book released back in 2003. In my opinion it's still the best supplement ever released for a miniatures game. Friends and I were still using the campaign system in 2010 for 8th Edition Warhammer games.
I was fortunate enough to have some of my work featured in the compendium. My Vampire Counts, some siege equipment, and the Skaven ships for the naval chapter. I still have all those ships and siege engines, and it's about time I put up some pictures.
It always feels like a cop-out to show off (literally) decades-old projects instead of new work, but hey– they look pretty and most readers probably haven't seen them before. I'm also discovering, as in the case of my Khemri Blood Bowl army (yeah I called it an army; Blood Bowl is not a team sport, it's a WAR!) that people out there remember having seen them in the original publications or web articles that are now mostly lost to the ages. It's a nice trip down memory lane with fresh, new images.
Skaven Pirate Ship

The concept behind this ship is that it was built from a salvaged Imperial cargo vessel, refitted by the Clan Skryre engineers into a warship. New warpstone-powered engines weigh down the stern, causing the bow to rise out of the water. The old waterline, along with some barnacles, can be seen along the bottom.
The model was built using layers of insulation foam, cut to the boat's shape, for the core. The foam was covered with strips of basswood, and all of the details added.

The two wooden walls at the very front were scratch-built siege mantlets that I had never finished, and worked into the ship's design. I believe the crates are Armorcast resin parts, but I could be wrong (it's been a while). The trophy shields are taken from all manner of GW kits. Most of the heraldry colors are representative of my friends' armies.

The stairs and grates are scratch-built from basswood strips. Extra details like the rats are scattered around the ship. Note the halfling in the basket (from the old metal giant kit). Is he a prisoner or a stowaway?

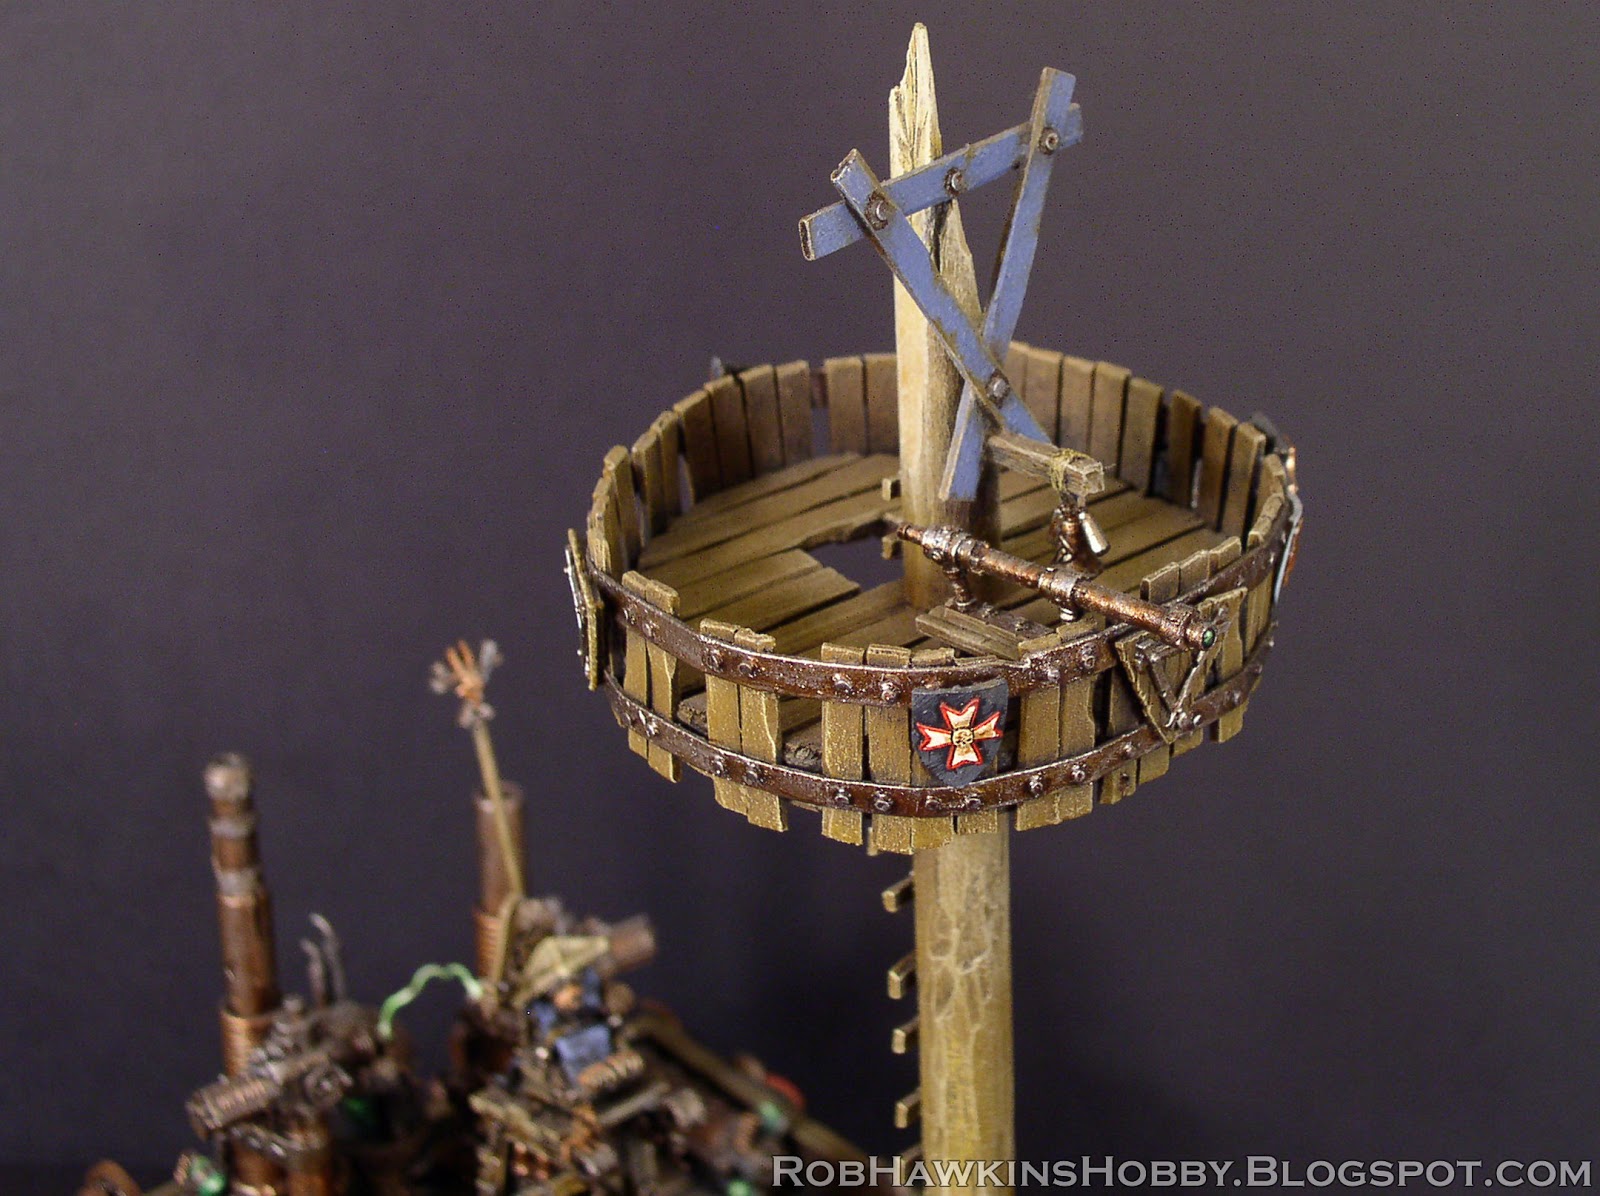
The ship's original mast, snapped in battle, has been reinforced with metal supports and turned into a crow's nest. The nest is large enough to hold two Skaven jezzail teams.
The metal bands around the outside are cardboard strips with glued-on rivets. The telescope is from the metal warp lightening cannon. There's also a warning bell next to it. "Iceberg, right ahead!"
The captain's perch is made from the framework of the old metal screaming bell. The captain himself, including his chair, is from the metal doom wheel. And, yes, he does indeed have a wooden sword and newspaper hat. He is quite mad.

Behind him is the Warpstone engine, constructed with a combination of parts from the Basilisk tank, doom wheel, and warp lightning kits. The electric arc is a piece of wire run between the two coils.

The paddle wheel is made from a doom wheel with other wheels and gears thrown in for the flywheel assembly.

The belts themselves are thick rubber bands, painted with an ink wash. Over the years the rubber has begun to deteriorate and a few have snapped, so I'd advise against using them on your own projects.

If you have any other questions about the construction that I haven't covered here, please ask in the comments. Just looking at this again, there are parts from dozens of Fantasy and 40K kits. I have two other Skaven barges that I don't think made it into The General's Compendium. Maybe I'll dig them out and get some pictures...
'Til next time!
Tuesday, May 14, 2013
Necromunda Building
One of the commissions I've been working on is this piece of Necromunda Terrain. The client wanted an open building with a few floors and working lights. I designed it with a landing pad on top, like a taxi station or cargo drop point.

The construction is foam core, with styrene trim and details. Here you can see the building's framework with some of my Templars for scale.

L-strips, punched with rivets from my trusty sewing punch, frame out the corners.

Styrene ladders and railings were added. (Safery first, this isn't the Death Star!)


The back of the building received a similar treatment.

I-beams were added to help support the roof.


On the sides are working doors, with walkway attachments.


Because the attachment points for the walkways are so narrow, they are magnetized to prevent the walkway from slipping off during gameplay.

The attachment points are also hinged to allow the walkways to connect to levels that might be a little higher or lower on adjoining buildings.

There are points for other walkways to attach, indicated by the caution strips on each level.

The landing pad was tricky because I needed to fit flashing landing lights into it.

The lights are 5mm LEDs. The housings are made from a section of tube, cut into a ring and placed over a hole-punched piece of styrene.

The bulbs come up through the landing pad and their wiring is run through the piping on the ceiling below.


The lights are powered by 9-volt batteries, housed in these "generators" on the exterior.

The light switches are disguised in the door control panels.


There are a lot more detail shots of this building in my terrain gallery. Check 'em out!
'Til next time!
Tuesday, May 7, 2013
Terrain Tutorial: Pipes
Here's a quick and easy way to make piping for your buildings, useful whether it's a sci-fi or steampunk setting.


What you will need:
A selection of styrene rod and tubes
Heat gun
Hobby knife
Thin super glue
The styrene rod will be bent into shape to form the pipe, and a ring cut from a section of tube will be added overtop to create the illusion of cuffs where the pipe segments join.
For this tutorial, I'm making pipes in two different sizes. The larger pipe uses 4.0mm rod and 5.5mm tube. The smaller uses 2.5mm rod and 4.0mm tube.

When selecting styrene for the thickness of your piping, be sure the tube fits perfectly over the rod without any gap.

Bending the Pipes
A heat gun is made for stripping paint, but it works just as well to bend plastic. Make sure you read all the safety information, and work in a well ventilated area with an appropriate respirator so you don't inhale any toxic fumes (you are melting plastic, after all).
I suppose it's possible that a hair dryer may do the trick, but I don't know if they get hot enough to evenly melt thicker plastic. It would certainly take longer. A heat gun is only $25-$30 and is a pretty handy tool to have for terrain building.

To create bends in the pipe, hold the rod over the edge of your table, and turn the heat gun on. The low setting is usually enough. (Keep the heat clear of your cutting mat and table so they don't burn.)

Hold it over the spot you want to bend and wait for the plastic to go "limp noodle."

When it starts to bend, turn off the heat gun and use the handle of a tool to hold it at the desired angle. Wait a few seconds for the plastic to cool...

...and you'll have a clean bend without any crimping.

Add as many bends as you like, and create turns in the pipe by bending the rod in perpendicular directions.

It may take a few attempts to get the feel for bending the plastic. Occasionally, you'll get a wonky corner. If that happens, hit it with more heat to soften it again and square off the bend. (Crooked bends can be useful for making dented or damaged pipes, so don't throw them away if they become unsalvageable.)

Be careful not to heat the rod too much or the plastic could swell, making it impossible to fit the rings over the bend in the next step.

Once all the bends are made, trim the ends of the pipe to the desired length.

Cutting the Rings
Use a new, sharp blade for this step. Measure about 1/16 to 1/8 inch from the end of the tube (I just eyeball it). Place your knife on the tube and roll it back and forth to score all the way around.

Keep the knife straight and controlled so the cuts line up all the way around. This image shows a cut that didn't line up properly. If this occurs, just cut off the end section and try again.

If the tube is small enough and the blade sharp enough, you may be able to make a clean cut by pressing straight through. The "rolling cut" technique will allow you to cut evenly without squishing the tube. Either way, make sure you have a backstop to prevent the pieces from shooting across the room when you're cutting.

Try to keep the rings a uniform thickness. Don't sweat it if you have to cut more than you'll need. Compared to the amount of styrene rod used, you'll have plenty of spare tube to make mistakes on.

Attaching the Rings
Once you have enough rings, it's time to assemble the pipes.

Slide a ring over the end and around the bend.

Then, add a drop of thin super glue. I'm using Zap-A-Gap Thin CA glue (in the pink bottle). The thin CA glue will run around the seam and secure the ring in place.

Then, add a second ring, creating the illusion of an elbow segment joining two straight pieces.

Finish off the pipe with a ring on each end. If you have a particularly long straight section, you could add a few rings along the length so it looks like several sections joined together. It probably bears mentioning that you should work from the center out toward the ends since you can't slide the rings over each other.

Here's a large and small pipe side-by-side.

Placement and Painting
The perpendicular bends are useful for fitting pipes into corners.

By adding multiple pipes you can create a visually interesting space, and step up the level of detail on your terrain.

This is the same arrangement from the side, as if the pipes were suspended from the ceiling and wall.

Paint the pipes with P3 Pig Iron and wash them with P3 Bloodstone for a rusty metal appearance.
For copper pipes, paint them with P3 Molten Bronze and wash them with a mix of P3 Thrall Flesh and P3 Arcane Blue to create a patina.
And there you have it– simple but effective pipes that will enhance any piece of terrain.
'Til next time!
Subscribe to:
Posts (Atom)